Admin Connection Guide
![]() Updated
by Brian Mohr
Updated
by Brian Mohr
Installing Integration+ from Nextup is a simple process the can be completed in less than 10 minutes. The setup is one-time and allows your team to get started right away.
The first step to getting started is to connect your Jira to your Slack workspace. You must be a Jira admin to complete this set-up.
Not everyone is a Jira admin - we get that. Contact your Jira admin and send them the information found in this document to get them started
What to know:
- You can only establish one Jira connection to one Slack workspaces. If you do need to connect Jira to multiple workspaces please contact sales@nextup.ai to discuss our Enterprise options.
- The user used for the initial connection will dictate the Jira access available when using the Bot. We therefore recommend making this initial connection through a Jira Service Account. Learn more about how permission work here.
- The must have the required Slack permissions to be able to add a bot to the workspace.
Connecting your Jira and Slack
- Log into the Nextup account portal at: https://account.nextup.ai/
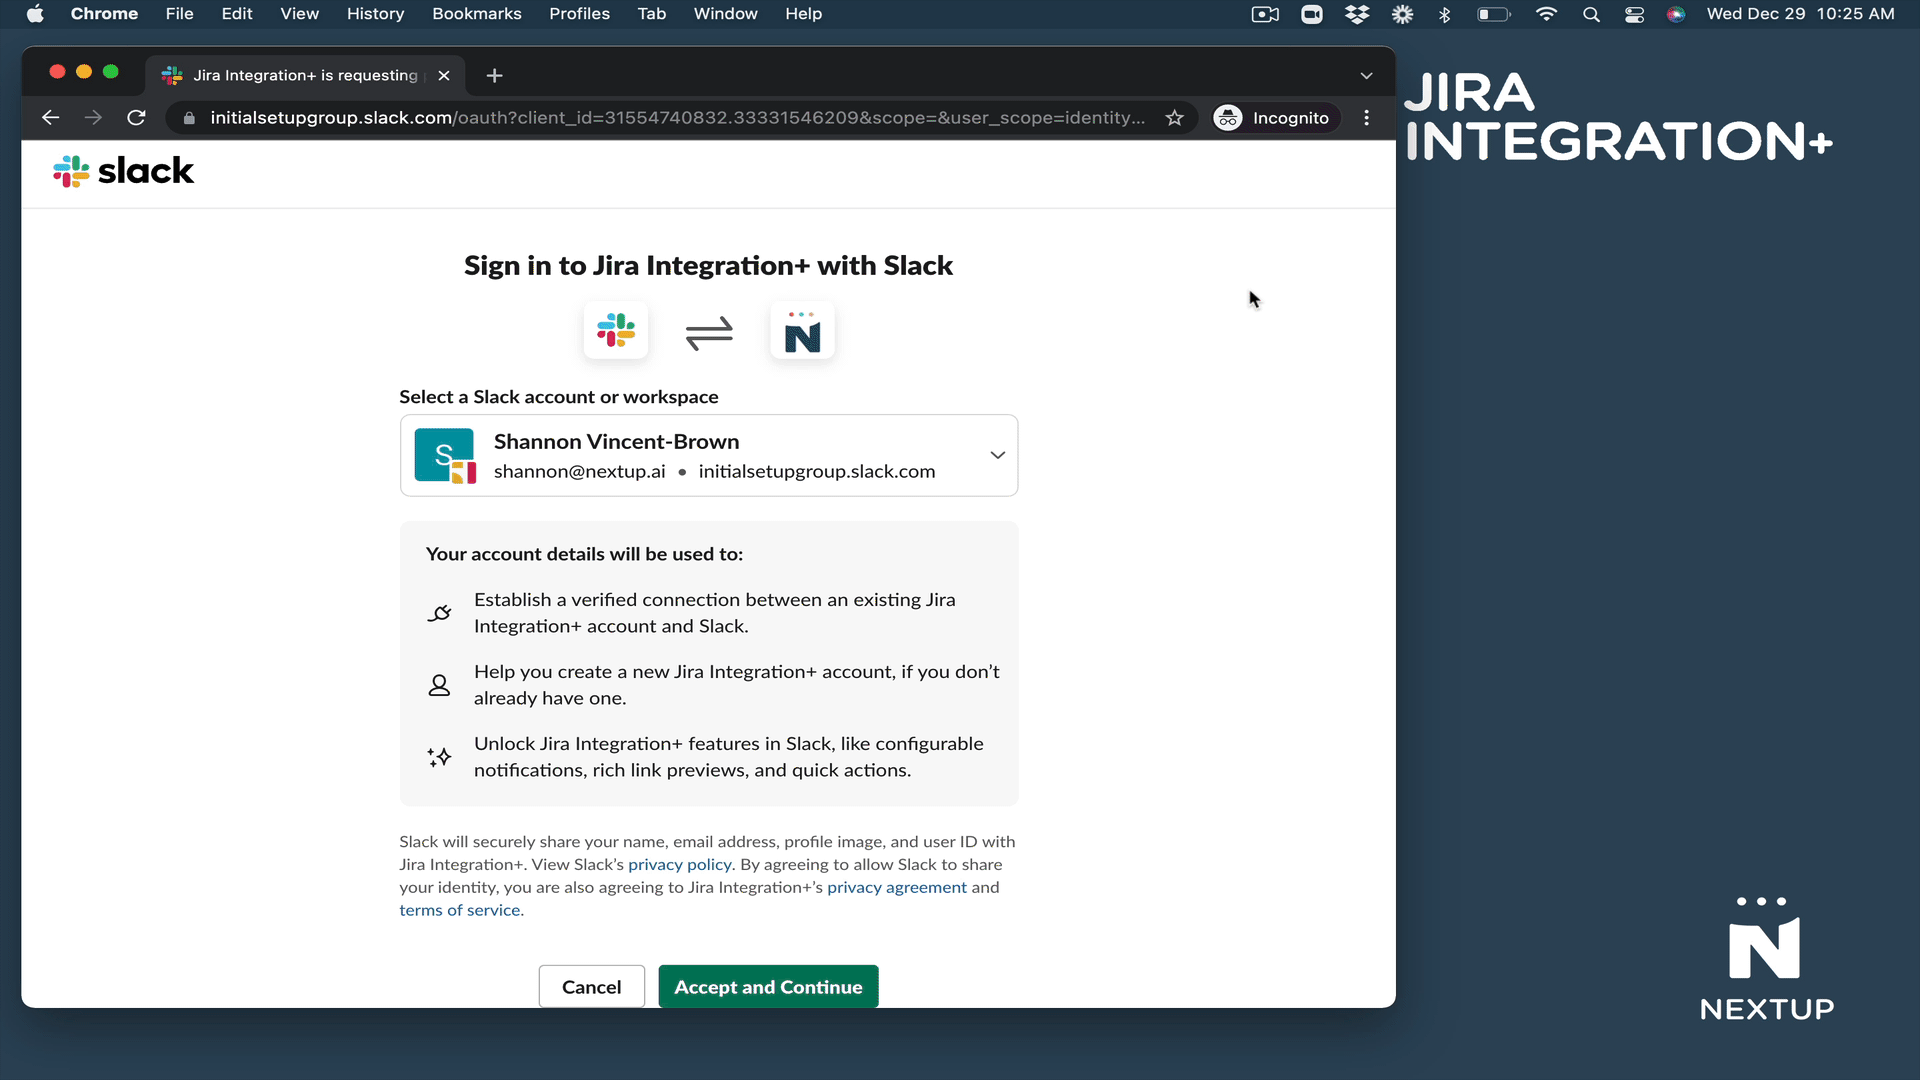
- Accept the security check to log-in your Slack user.
- Once you are in the account portal, select Jira Integration+ from the left hand navigation.
- Then, click the "Add to Slack" button
- Next, grant the application permission to your Slack workspace by clicking "Allow".
- Enter the full web address (URL) of your Jira instance.
- NOTE: Your Jira instance must be publicly accessible from the internet in order to connect this application. If not publicly accessible, you will need to allow all traffic from Nextup servers from our IP addresses.
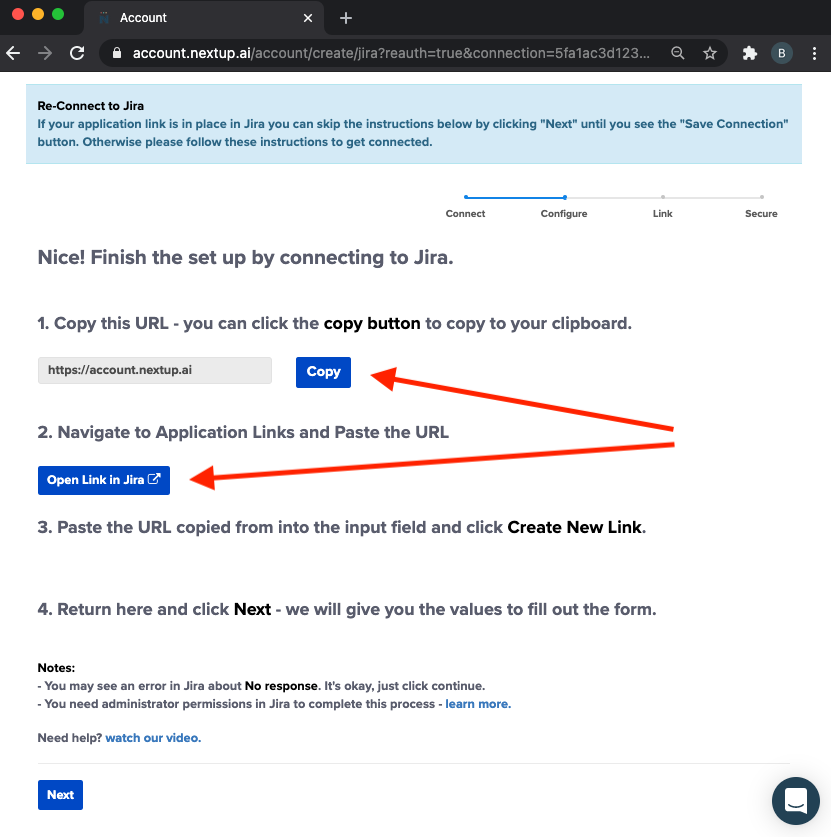
- Click the "Copy" button to copy text to your computer's clipboard (for the next step). Then, click "Open Link in Jira" to open the application link configuration page in your Jira instance.
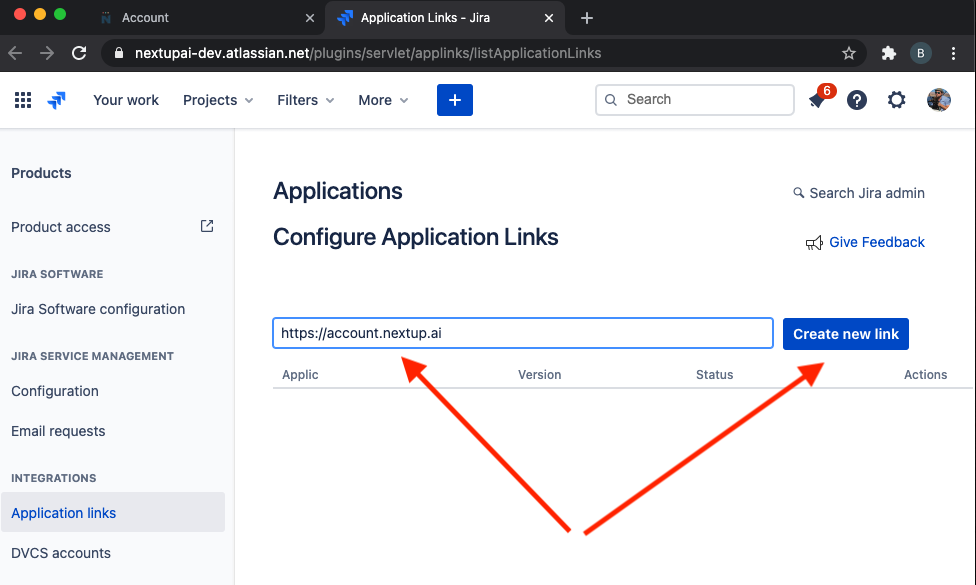
- Once Jira opens, paste the web address value from your clipboard into the field as illustrated below, and click "Create new link".
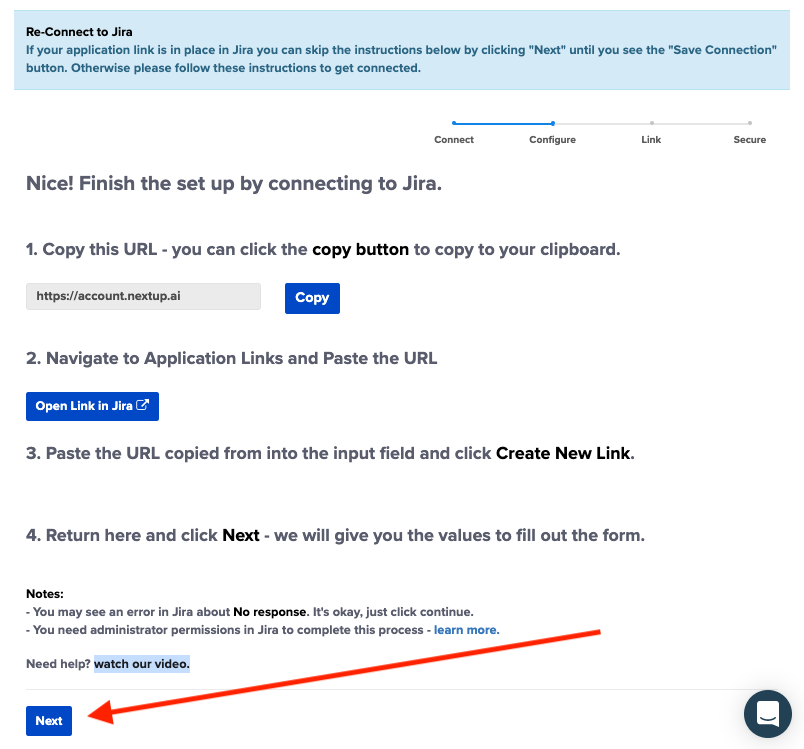
- Return to the Account Portal tab and click "Next".
- Then click "Copy" and "Next".
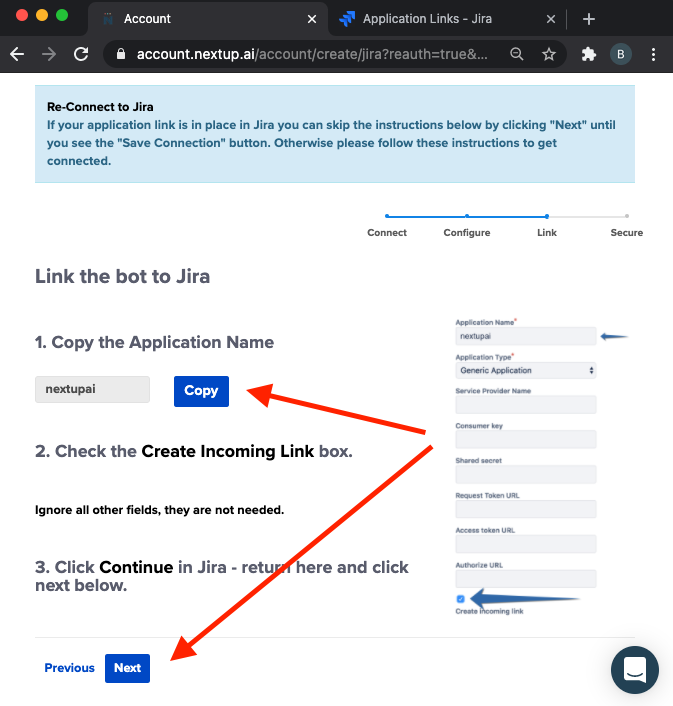
- Return to Jira and paste the value from your clipboard into the "Application Link" field. Also, make sure you check the value at the BOTTOM of the form labeled "Create incoming link". Then click "Continue".
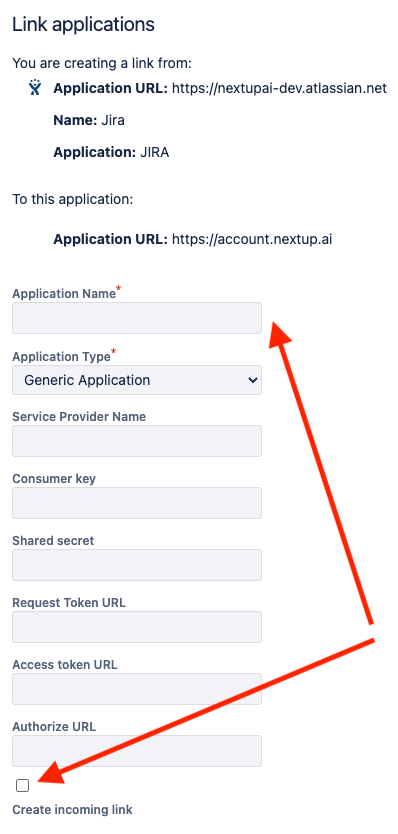
- Return to the Nextup account portal and copy/paste the following values into your Jira window. Then click "Continue" in Jira.

- Once this information is saved in Jira, return to the Nextup account portal and click "Next". Then, "Save Connection".
- Next, click "Allow" to grant the Nextup bot the associated permissions to your Jira instance.
- NOTE: you can now close this window.
- Go to account.nextup.ai to complete your admin configurations.
😠 Nothing happens when I try this!
Review these FAQs to assist you with your initial connection. If you are still having trouble please pick a time for live support: https://calendly.com/nextupai/support